How To Create Camos For Existing Bf2 Weapons: Creating the Camo:
http://www.bfeditor.org/forums/index.php?/topic/14340-how-to-create-camos-for-existing-bf2-weapons/
Creating the first and second colour:
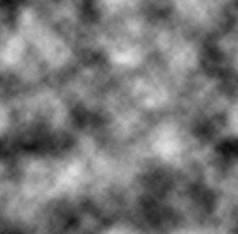
So, I will assume you know how to do the extreme basics of photoshop. Create a new 1024x1024 pixel document. Make sure the colours in the corner are set to default, black and white. Go Filters>Renderer>Clouds. You should get something like this
 |
|---|
Image File: camoimage1.jpg
Go Filter>Blur>Gaussian Blur and set it to 3.0
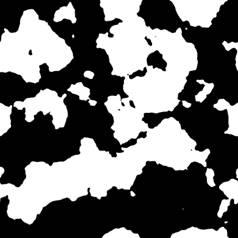
Now Go Image>Adjustments>Threshold and set it to 128. You should get something like this
 |
|---|
Image File: camoimage3.jpg
Its a very nice cow skin, but we want a camo. At this point you can decide to look up an existing camo or make your own. I will be using Fall camo, from Call of Duty: Modern Warefare 2
 |
|---|
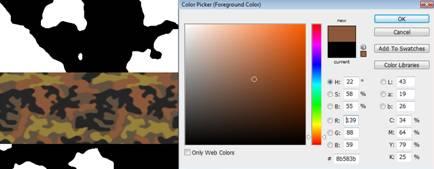
Now, from the picture, it is obvious the background colour is that light brown, but that will just be a fill, so the next layer above that is that brownish orange. Create a new layer over the top of the Cowskin and paste your image of your camo. Select the first layer above the backgrounds colour (orange) with the eyedropper. It should look like this
 |
|---|
Image File: camoimage5.jpg
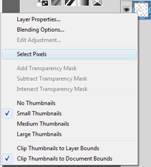
Now hide the reference camo layer and the select the Cowskin. Go Select>Colour Rage>.Due to the new features of CS4 Photoshop, you shouldnt eyedrop the black because it has a range for some reason. Just move Fuzziness to full and Localised Colour Clusters ticked, it should automatically choose the black. If you have your layer Locked and labelled "Background" you should unlock it by copying it (Control J), keeping that layer, and deleting the previous layer. Go back to Colour Range if you forgot to do this. Hit Delete, and the black will be deleted and replaced by the Default Grid Transparent. Rightclick the current layers image and press select pixels as shown below
 |
|---|
Image File: camoimage4.jpg
Hit G for Paint Bucket tool, set tolerance to 255, Anti-aliased tick, Continues tick. Then press Control D to Deselect. Now create a new layer and place it behind everything. Fill it with your background layer of your camo.
 |
|---|
Image File: camoimage7.jpg
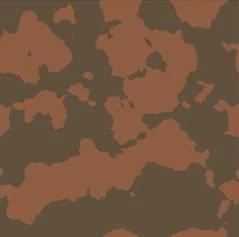
You should get something like this. This makes a great clay camo, but we want a few more colours.
Creating the third colour:
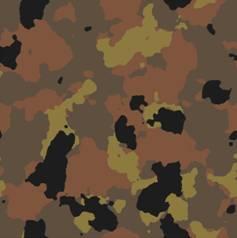
Skip this step if your camo requires only two colours. Create a new layer and set the colours to default, Black and White again. Again, Filter>Renderer>Clouds. Then Filter>Renderer>Gaussian Blue> Set to 3.0. Image>Adjustments>Threshold> set to 100. This is so that the layer on top has a smaller variety. Go Select>Colour Range> Okay. Now your black will be selected, however, the black is what we want so we are going to invert the selection and delete the white. Now Select the newly created layer and go Rightclick>Select Pixels. Fill with the next layer of your selected camo that goes on top.
Creating the forth colour:
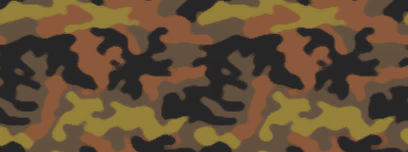
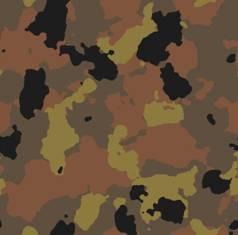
Skip this step if your camo requires only three colours. Create a new layer and set the colours to default, Black and White again. Again, Filter>Renderer>Clouds. Then Filter>Renderer>Gaussian Blue> Set to 3.0. Image>Adjustments>Threshold> set to 90-95. Get a feel for what your final colour should be. The less of the number, the less the camo will show up. I choose 90 for mine. Again, go Select>Colour Rage>Okay. Invert the selection and delete the white. Now select pixels of that layer and choose the final colour.
 |
|---|
Image File: camoimage6.jpg
Woot! we have our camo.
Optional Edits: For me, I didnt like the look of the dark grey on the camo, it was not centred enough. Offsetting it made it look better. Go Filter>Other>Offset. Choose a horizontal, or vertical offset. For me I did 300+ vertical so that black was more centred. So it looked like this
 |
|---|
Image File: camoimage9.jpg
The dark grey looks much nicer :D
Now Merge all your layers, and delete your reference image, cause you already made it so its not needed anymore. Apply a 1.0 Gaussian blue to your image just for it to be not as sharp. Well done you have just made a camo!
Applying your camo to a weapon:
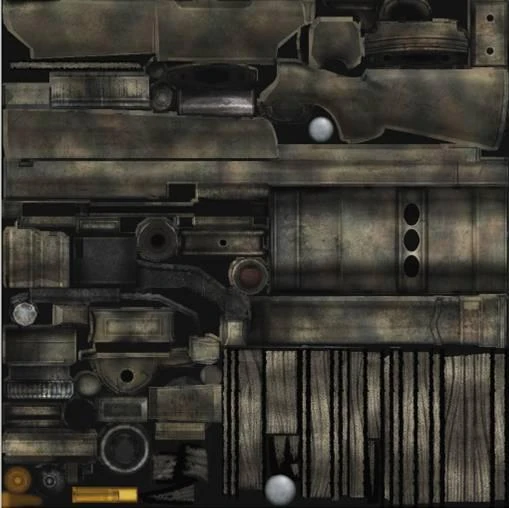
Now, you should have the default bf2 archieves extracted somewhere as a refrence for modding. Using the extracted archieves will let us open bf2's weapon texture. Lets open up the M24s texture, USRIF_m24, using photoshop. You should have the dds tools by Nvidea to even think about texturing for bf2. You can use BFMesh tool, a free program released to examine the where textures are the bundlemesh uses, this is useful for Ironsighted weapons. Back to the M24, open up usrif_m24_c.dds in photoshop.
 |
|---|
Image File: camoimage12.jpg
This should be what you opened. Remember not to open the _b as that is the normal map, which shouldnt be edited if you are just doing a camo. Copy over your camo over the top of the texture. It should just fit, due to the 1024x1024 size. Now you must select a blending mode for it. Multiply looks best, but it is to dark. Not to worry, copy the background (Control J) and make the blending mode Screen. Copy the Screen Layer twice and you will see that the original camo is back. Select your camo layer and adjust the opacity so that its not to vibrant. I made mine 85%. Now certain parts of the gun that shouldnt be camod, should be either masked out or deleted. For instance, the bullet. Because of the screen layers, the bullet is to bright, so delete the bullet out of all the screen layers except for "Background". Now you have your camo!
 |
|---|
Image File: camoimage10.jpg
That looks great! Save it as usrif_m24_c_fall.dds (It is named _fall because that is the name of my camo). With the blending modes, Multiply with the screen trick works for grey/white weapons, Colour Dodge works nicely with black weapons, generally. Here is a shot of it using BfMeshView 1.8.0
 |
|---|
Image File: camoimage11.jpg
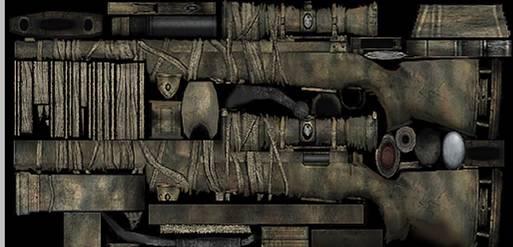
Looks better than the texture! But were not done yet! This weapon uses a different texture for 3p models than 1p. To save memory of course. Some weapons you can resize the 1p texture to a smaller 3p one, but this one has different UVW mapping to the 3p. Now open up the 3p texture, labelled usrif_m24_mini.dds into Photoshop.
 |
|---|
Image File: camoimage13.jpg
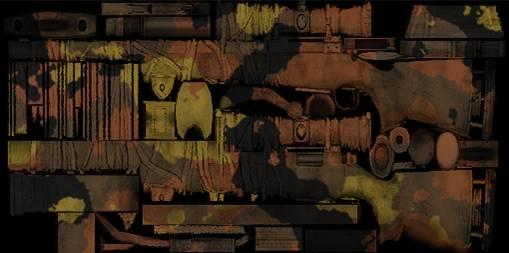
Because the colour scheme is pretty much identical to the 1p texture, it is much easier to do the camo. First of all, you must resize your camo texture to fit. Because it is wider horizontal, do not distort your camo to fit, just vertical so holding down shift when resizes is better, to keep it square. Same story with the screens and multiplies. Now, save it as usrif_m24_mini_fall.dds.
 |
|---|
Image File: camoimage14.jpg
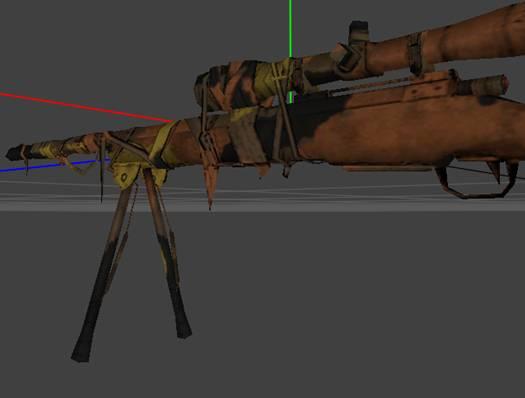
So thats the texture done. Now to see the 3p model using BfMeshView 1.8.0
 |
|---|
Image File: camoimage15.jpg
There! So the 3p model looks very similar to the 1p even though they are different textures.
NOTES:
Most of the ironsights textures are located in Objects\Weapons\Handheld\textures\blurscopexx.dds
You must rename original textures to something else and rename your textures to original to view in BfMeshView 1.8.0. But don't forget to rename it back
Mask or erase out lens, in the camo for textures. Doesnt look good having paint over the top.
Dont textures 1p lod1 sniper scopes as they use the black in it for the crosshair and camod crosshair is pretty lame.
Getting your camo ingame
You must open up Objects_client.zip of your mod and locate Objects\Weapons\Handheld\ folder. Create USRIF_m24 folder and then create a Textures sub folder. Place your textures (with the appropriate _camoname) in there. It shouldn't replace the original texture like this.
 |
|---|
Image File: camoimage16.jpg
Now find a map you would like your texture to be displayed in. For instance, wake island. Open up Server.zip of wake island in your mod and click find Init.con. It will probably be "read-only" i would recommend using notepad++ as it can make the file readonly without having to save it somewhere else and repack. Find this piece of code
if v_arg1 == BF2Editor
LevelSettings.CustomTextureSuffix "Woodland"
else
texturemanager.customTextureSuffix "Woodland"
endIf
As you can see, Wake Island uses Woodland textures. Of coarse, if you wanted your texture to show up for woodland, you should rename your camos from _camoname to _woodland, thus making this step irrelevent. However, if you would like to make a whole new texture scheme, rename the "woodland" to "Camoname" Save it and then Winrar should ask if you want to overwrite the file. Press yes.
ZOWEE! you have just made your first camo'd weapons playable in bf2.
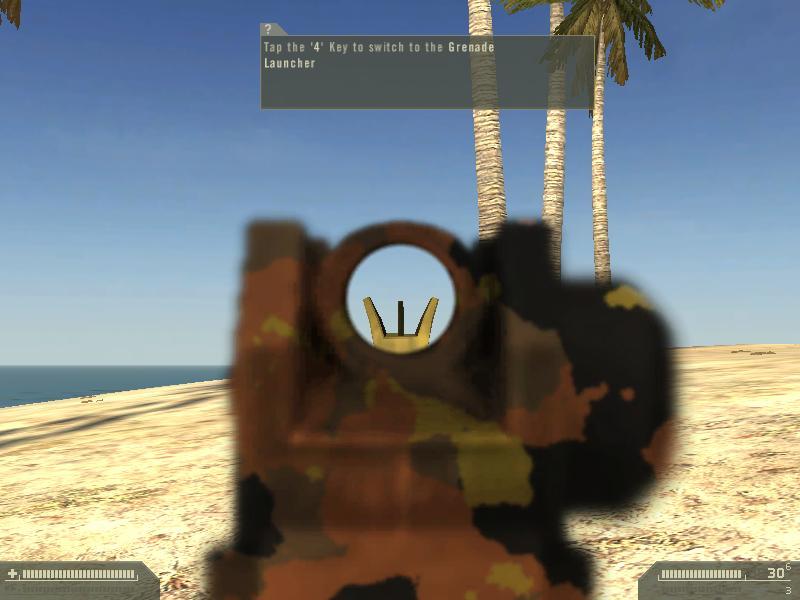
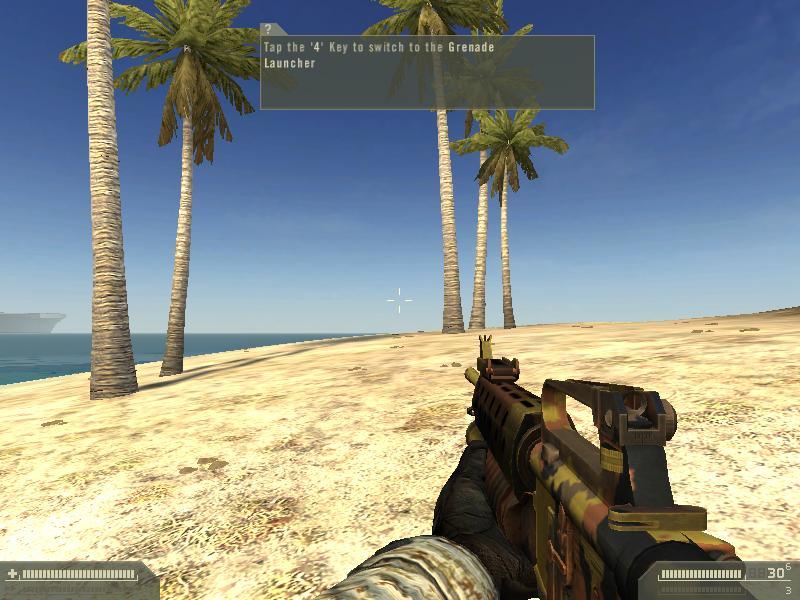
M16:
 |
|---|
Image File: camoimage17.jpg
 |
|---|
Image File: camoimage18.jpg
Don't think that this is only for weapons, you can apply camo to everything! even buildings