[]
What is new in Navmesh Tool Ver 4.0:
THE NEW TOOL IS BEING TESTED AND HAS NOT BEEN RELEASED YET
Update: 5 July 2020. I had to take a break from this project due to real life issues. I should be able to get back to it in a month or two. I did run into a development problem that I did not figure out until after I had spend a lot of time working on it. I am learning to use the GUI tools from tutorials on the internet and now know that the examples are really basic. The problem is that I could select all the options I needed, but they were not being passed to the rest of the tool to actually do anything. I have to recode the GUI window differently so that I can pass those options to the rest of the script.
- The Updated navmesh tool is now a GUI consolidated tool that uses Python 3
 |
|---|
Additional Features:
- Automatically set up the Navmesh work files for the specific map.
- Automatically copy the GTSdata from the map to the navmesh work area prior to generating the navmesh files.
- Automatically copy the Output files from the navmesh work area to the map after running "Fix Navmesh" routine.
- Option to Choose to work on only infantry, vehicle or both navmeshes.
- Option to select a different map to work on.
- Option to launch the BF2 Editor with the selected mod and map
- Fix Navmesh now cleans the navmesh file to a format that works with the navmesh tool. This fixes most known issues with exporting from from 3d modeling software -- specifically from 3ds Max and Blender. Previously this has been a big headache to manually fix the navmesh file after exporting.
- There is now an advanced option to use the largest navmesh islands - for those that are not into 3d modeling and also for quick testing purposes.
- There is another advanced option to use the clean the navmesh files.
- Navmesh files are automatically backed up with date -time stamp in the file name to maintain a copy of the orginal navmeshes. The file location is \navmesh\work\[map name]\GTSdata\Backup\
The process of creating a navmesh involves these steps:
1) Setup the map in the editor to prepare for navmeshing as detailed in the
A.) A copy of Python installed (v3.0+)
B.) At least 2 Capture Points (flags)
C.) A Closed Combat Area (Placed anti-clockwise with the 'Used by pathfinding' Checked.
D.) An 'ai' folder in your level directory containing an 'ai.ai' file. (can be copied from an existing single player bf2 map)
2.) Create the Navmesh. This step generates a 3d mesh that can be edited with 3d modeling software.
3.) Edit the navmesh with 3d modeling software so that there is one continuous mesh and no mesh islands. This is explained in more detail in the navmesh rules. Here is where the navmesh can be optimized, cleaned up, manipulated to better follow the terrain checked that the objects were navmeshed correctly.
Alternative Solution: The largest Navmesh Island can be used instead.
4.) Fix the navmesh. In this step, you will run a script that prepares the navmesh obj file into a format that prepares it for use by the editor.
5.) Use the BF2 Editor to convert into AIpathfinding files. In this step you will load the map up in the editor and convert the 'fixed' navmesh into a format that can be used by the game and viewed in the editor. This is where you will want to take a look at the green on the ground indicating your navmesh and move spawns so they don't show red.
6.) Get the AIpathfinding files in game and test it out.
Be prepared to go back and redo steps several times to get a good navmesh. It takes experience to get a good feel for if you need to go back and set up the map better for navmeshing or just do some editing with a 3d modeling tool. It is possible to get a workable navmesh with small combat areas (stanadrd BF2 16 player sized areas) with no editing and good prepwork in the editor. However, if your serious about navmeshing then you really need to learn to use at least Blender. It's free and it natively supports the navmesh format. The only problem with Blender is that the obj file plug-in it doesn't handle the three navmesh materials (ground, shallow water and deep water). Everything shows up as ground. That is where the clean navmesh routine becomes very useful as explained later on..
Note: non standard maps must have all kits filled and an overgrowth folder. There are some non-standard maps that have less than the standard number of kits. You can use duplicate kits, but the AI will select from each possible kit to spawn bots, so they all need to be filled. For maps that don't have overgrowth, they still need to have an empty overgrowth.con file.
SETUP
Here's what we need to do in order to get started:.
All the navmesh related files are in \Battlefield 2\Navmesh. I suggest sending a short-cut of this folder to your desktop to save a lot of time in the future. It’s also handy to have a shortcut on your desktop to the bf2 levels folder as well.
First things first - Makes sure you have a copy of python v3 or above installed on your computer. None of this will work without it installed.
Now run your new .bat file
The first thing will be displayed a list of mods to select from:
 |
|---|
Next, select the Map to work on:
 |
|---|
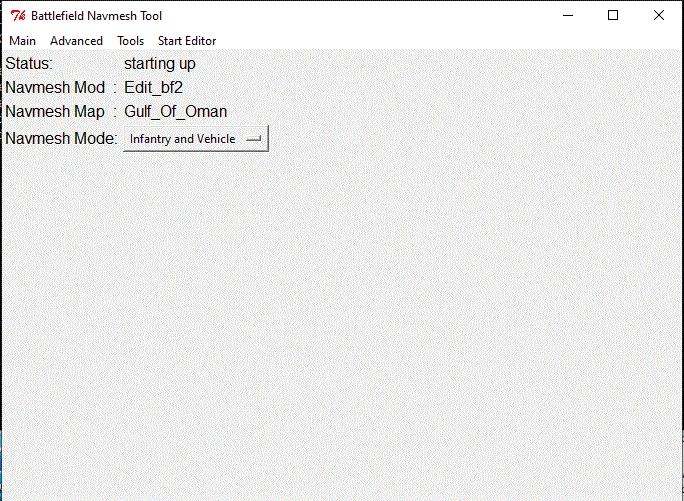
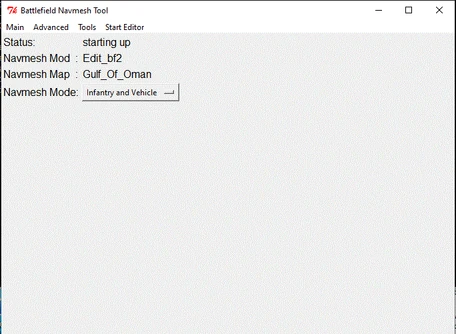
After map, selection, The tool displays the main menu:
 |
|---|
At the main menu, the map selected and navmesh mode are displayed at the top.
Here is an overview of the options


| |
|---|
place holder
| |
|---|
place holder
| |
|---|
Place holder
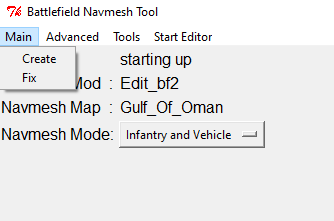
(1) Change the map level : select if you want to choose a different map to navmesh. All work is done on the selected map/mod.
(2) Change the navmesh mode - infantry, vehicle or Both : select if want to change the navmesh mode.
It is usually best to create and test the infantry navmesh first and then work on the vehicle navmesh. You can choose which navmesh to work on, or choose to work on both.
(3) Create New Navmesh - This is what creates the navmesh files based on the navmesh mode selected and the map. This process can take a long time - anywhere from an hour for a small map to several days for a large complicated map. This step will copy the GTSdata files automatically.
(4) Fix Navmesh - This needs to be performed after the navmeshes are created in step 3. But, first the navmesh needs to be checked for islands and any editing needed done with 3d modeling software such as 3ds Max, Maya or Blender. Clean up is explained elsewhere, but the navmesh is cleaned up automatically as part of this step to prepare to be "Fixed". Even if there are no navmesh islands, Fix Navmesh must be run prior to the last step of loading the BF2 editor. The last part of this process copies over the files needed to the map being worked on to be used when the BF2 editor is loaded.
(5) Go to Advanced Menu -- This will take you to the main menu as pictured below. The options are listed below, under Advanced Menu Options.
(6) Launch the BF2 Editor with the Selected Map - This loads the editor with the mod and map currently in use. This is part of the last step Navmesh step and explained further on.
 |
|---|
Advanced Menu Options
(1) Clean the Navmesh - This will clean the infantry.obj and/or vehicle.obj navmesh files. This sets up the file into a format that is ready for the Fix Navmesh process. The Clean Navmesh is done automatically as part of both the Fix Navmesh process and Copy Navmesh Island process. It should only be needed for debugging and testing, and not for regular use -- which is why it is in the Advanced menu
(2) Copy Largest Navmesh Islands - This can be used for testing and when the user desires to try to create a navmesh without editing it. It is recommended to edit the navmesh instead of using navmesh islands.
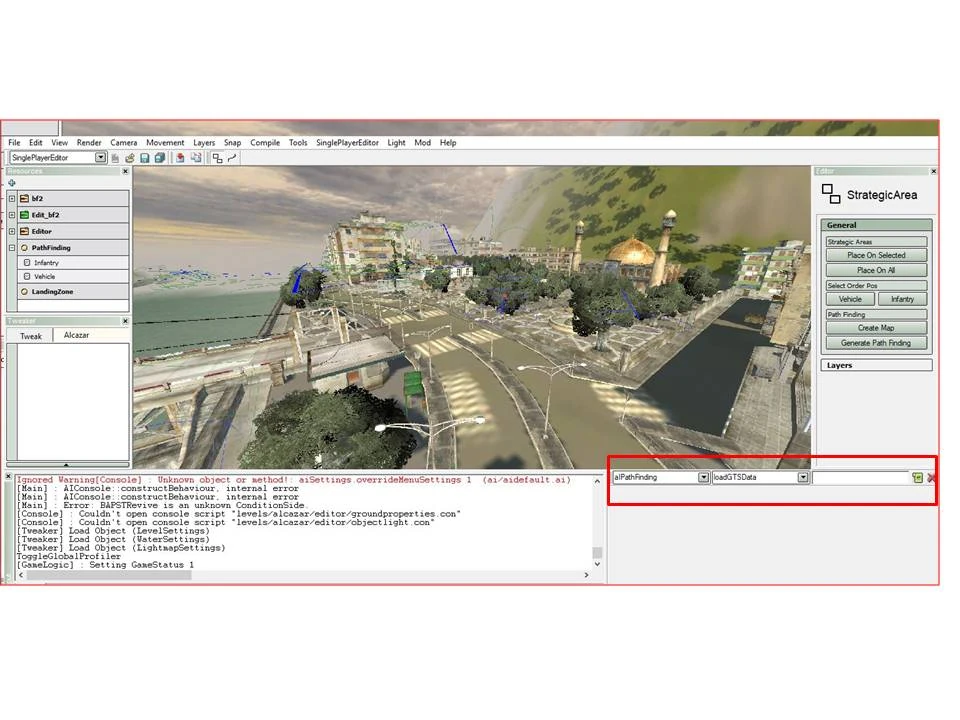
Loading the BF2 Editor
 |
|---|
Once the map is loaded for the BF2 editor, switch to singleplayer mode. This is the automatic startup mode if launching from the Navmesh tool.
Once the editor is finished loading, use the command windows at the bottom right of the screen (As outlined in the red box in the screenshot of the Editor pictured in the photo above) and select 'Aipathfinding' in the first and 'loadgtsdata' in the second and then select the green button to the right as the execute button. Large maps could take a little while.
The next step is to then select 'savequadtrees' from the second window and the execute button to the right. If the command window has any red letter error messages, your navmesh has issues. Go back to the navmesh obj file in the 3d modeling tool and check those common errors as listed in the tutorials. Then re-fix it and repeat this step again. The command window info isn't helpful in identifying an error. It only tells you that there is a problem.
Go back to the command windows in the editor and create the Aerial Height map, by selecting 'AI' in the first window and 'Aerial height map' in the second and then select the execute button to the right. Larger maps can take a few minutes to complete. If after testing, you can create a more accuate test map by typing 64 or 128 in the third window. Default is believed to be 32. A lower resolution map would be 16.
If sucessful, you will have an AIpathfinding folder in your map updated with new files.
Now, check your vehicle and soldier spawns in the editor. You can display the AI path as a green texture over the terrian in the editor.
Select the 'Render' Menu - 'AI' - and select "Toggle Draw AI" (this will enable you to see the strategic areas and neighboring).
Then select 'Render' Menu - 'AI' - and select "Toggle Draw Infantry navmesh" or "Toggle Draw Vehicle navmesh" to check the Soldier and vehicle spawns. Green is good path. Red is bad.
Once you have all spawns set up on Green areas, you are ready to move onto the next step, which is to packaged the map for playtesting:
http://classic-battlefield-modding.wikia.com/wiki/Packaging_the_map_for_Playtesting