Battlefield 2 Modding Tutorial - Creating a Basic Terrain[]
Welcome to the Battlefield 2 Modding Tutorial series. This is a series designed to take you through all aspects of the modding process, starting simple and working up to the most intricate of concepts. When you have finished this series, you will be able to create a completely original mod.
Please note that these tutorials are in a particular sequence, with new information built upon concepts learned in previous lessons. That being said, hopefully they are constructed in such a way that if you are interested in just one particular aspect or are just brushing up on a particular technique, you will be able to find the information you are looking for relatively easily and painlessly.
In order for you to experience the fun of playing your own map as quickly as possible, the first thing we will do is create a custom map for standard Battlefield 2. In later tutorials we will go through all the necessary steps to setting up your own custom mod and creating all your own custom assets.
== Set-up ==
If you haven’t installed the editor, do so now. In order for everything to work correctly, you should make sure you’ve installed both Battlefield 2 and the editor to their default locations. There are several paths that the editor has to keep track of, and it’s just a lot easier to use the default locations.
Launching the Editor[]
- Start up the BF2 editor
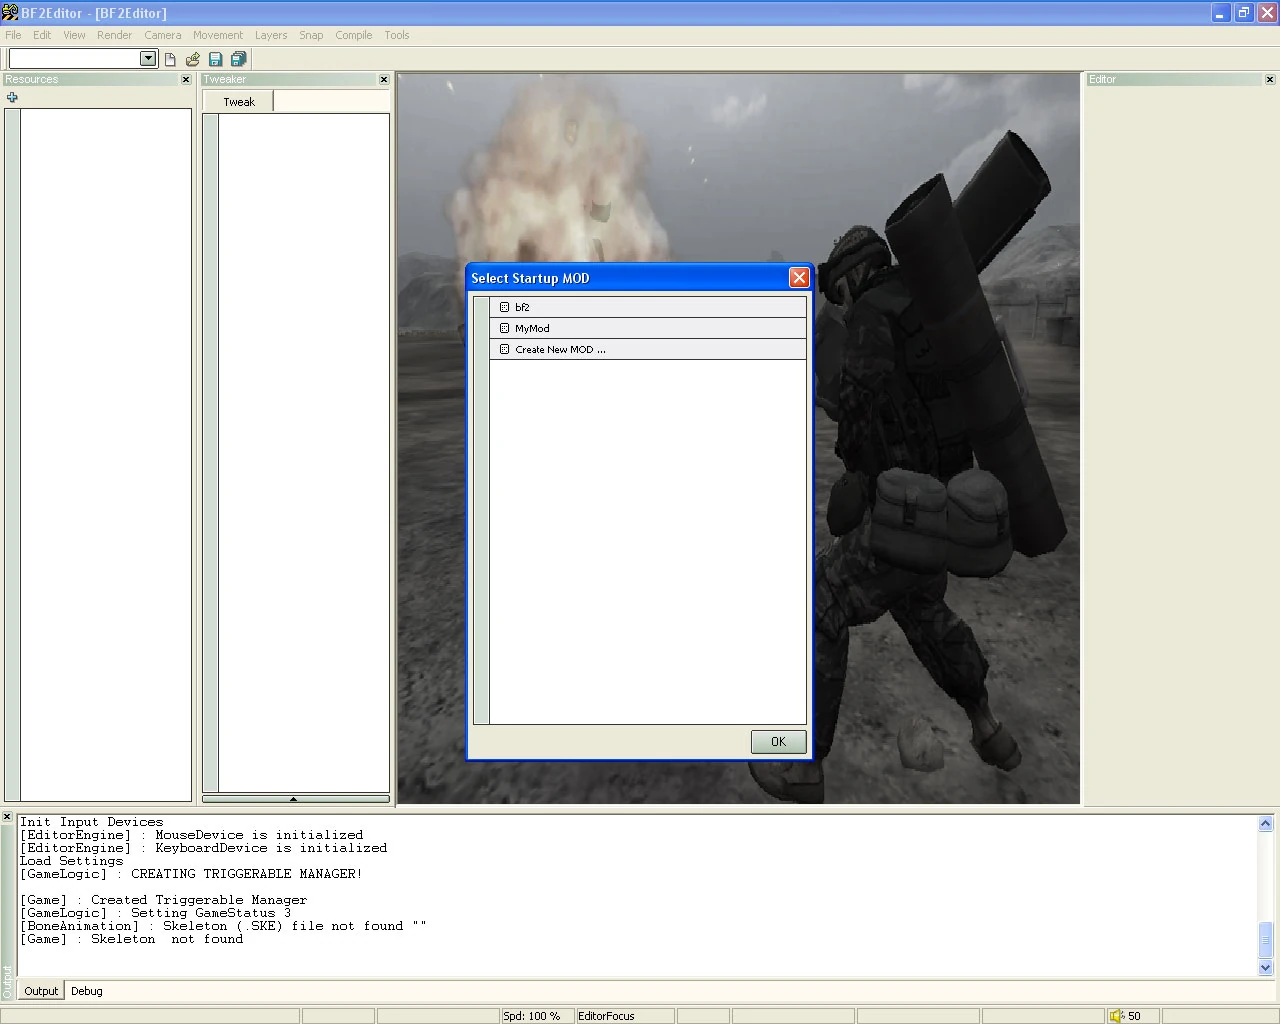
The first thing you will see is the “Select Startup Mod” window:
- Select “bf2” and click “OK”.
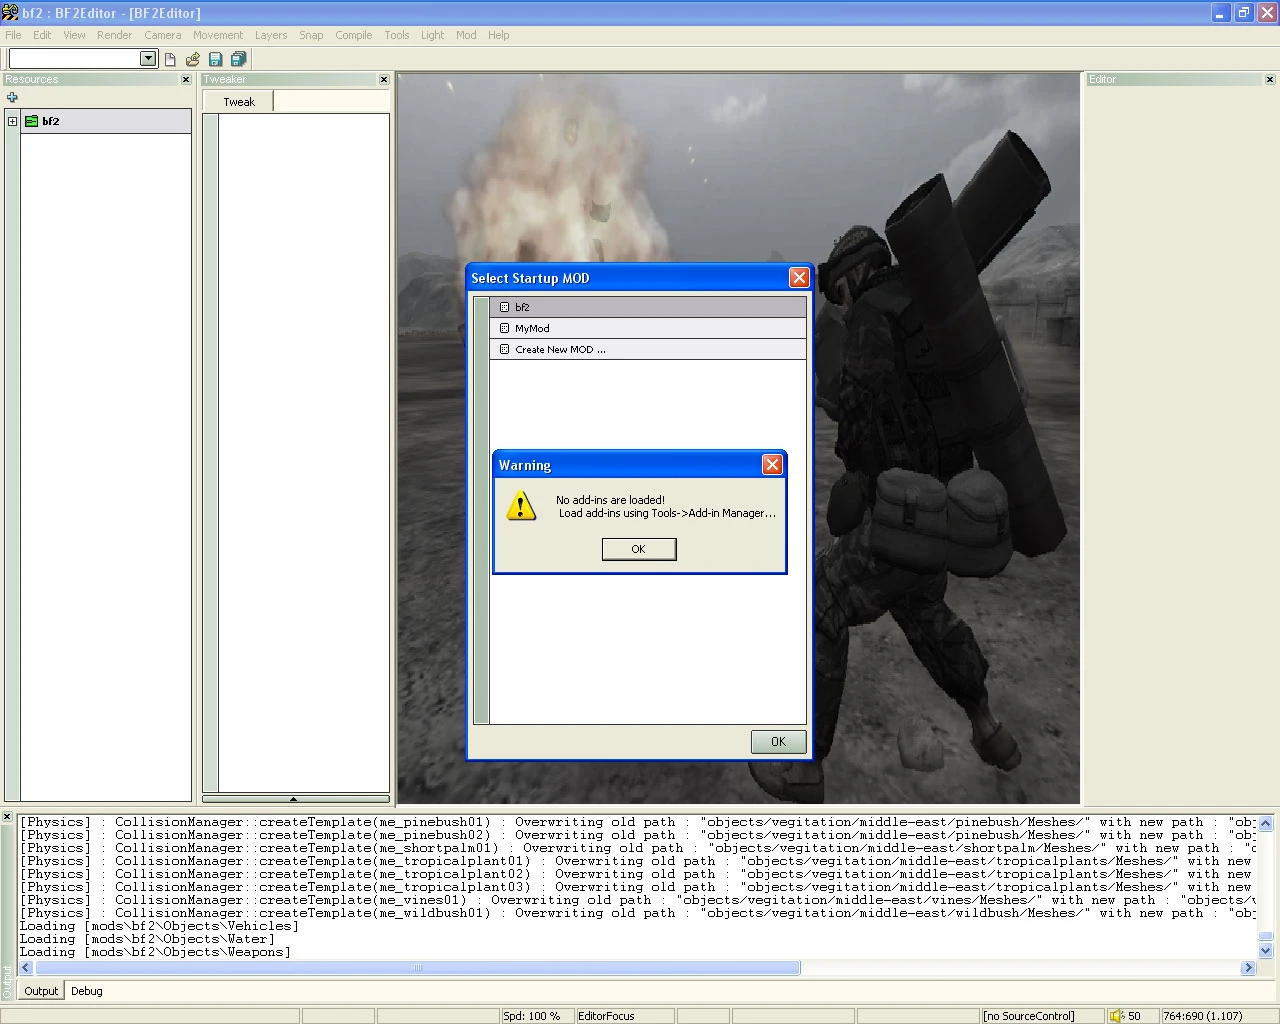
If this is the first time you’ve run the editor, you may also get the following Warning saying you have no add-ins loaded:
- Click “OK” to dismiss this warning.
After the editor finishes loading we will correct this.
Note: there is a window near the bottom of the main editor called the Output Window. A lot of text will flow through this window at start-up and at other times when you are working. Most of the time you can just ignore this. If you get an error when working on something, you may find additional useful information here. Any text you find in this window in my screenshots may not match what you get when performing the same operations.
The first step is to check that all sections of the editor are loading at start-up. Chances are they already are. We just want to be sure.
- Select “Tools>Add-in
Manager…” from the menu bar.
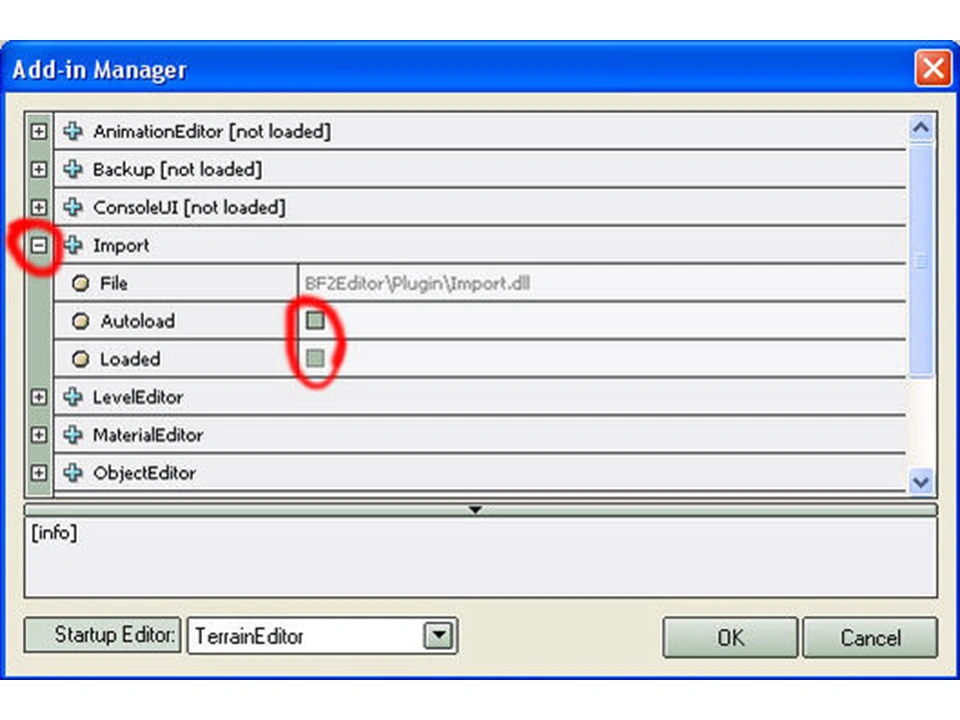
- In the window that pops up, click on the small
plus sign to the far left of “Import”. (Not the greenish plus sign, the one to the left of it.)
- With the “Import” section expanded, click the buttons to
the right of “autoload” and “Loaded” if they are not already checked. Make sure they are shaded, not white. They should look like this:
- Do the same for LevelEditor,
ObjectEditor, and TerrainEditor, making sure each of those sections has both boxes checked.
- Next to “Startup Editor:” at the bottom left, select the
module you would like to start in each time you launch the editor.
- When you are finished, click “OK”.
 |
|---|
Note: You only have to do this once, not every time you start the editor. We won’t be using all of these subsections right now, but this way they are loaded when we need them.
The Terrain Editor[]
The Terrain Editor is where you sculpt hills and valleys, paint all your surface textures, and anything else that deals with the actual terrain itself. This is also where you will eventually create the minimap and set all the parameters for the sky, sun, water, and other rendering attributes, but this will be saved for a later tutorial so that you can get to playing your map as soon as possible.
Note: related to the Terrain Editor is the Level Editor, which we will cover in the next tutorial. They look almost the same, so don’t get these two confused. The Level Editor is where you place control points, objects, vehicles, and so on, set level options like teams and tickets, and also where you will render out lightmaps.
The drop-down box in the upper left corner of the editor is where you select which module you want to work in.
- Make sure this says “TerrainEditor”.
- To the immediate right of the
drop-down box is a standard windows “New” icon. If you hold the cursor over it for a few seconds, tooltips will display the name.
- Click on this icon or choose
“File>New” from the menu bar. This will bring up the “Create new terrain” window.
- In the section labeled
“Name”, enter “My_Level”.
- In the drop-down box under
“Size”, change the number to 256.
- Leave all other options at their defaults and click “OK”.
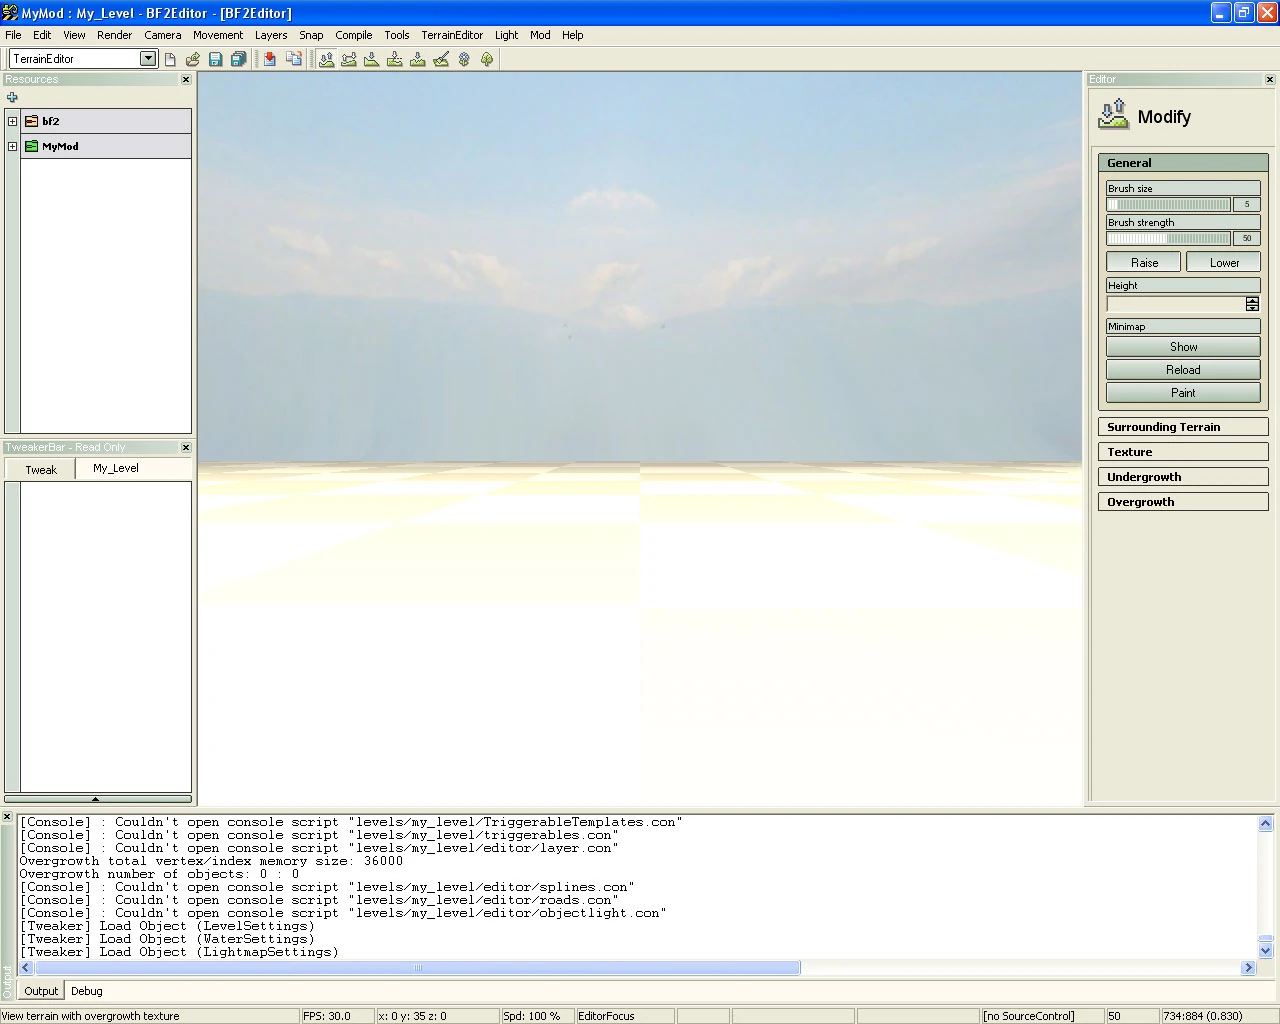
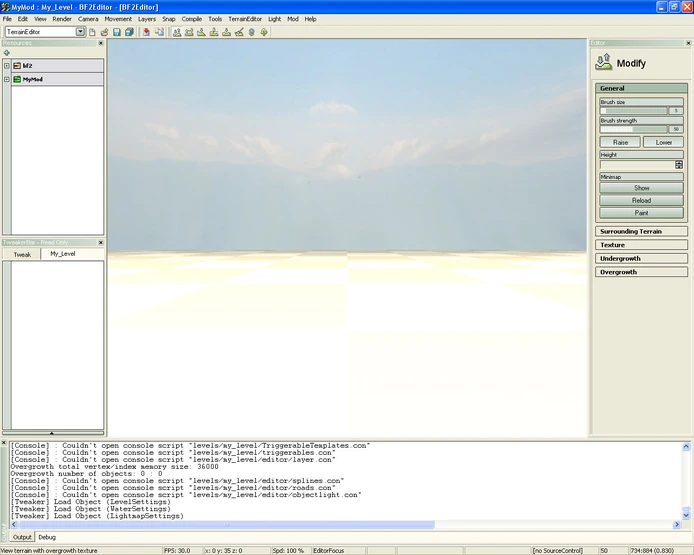
Your editor should now look similar to this:
  |
|---|
Note: You can rearrange the windows of the editor by clicking on the label bar of each section and dragging to another area of your screen. My screen may not look exactly the same as yours. For instance: I’ve docked the TweakerBar underneath the Resources bar to make my main window larger.
What you should be seeing now is a checkerboard, which is the default texture, and a yellowish, bright color that falls off with distance. This is because of the default lighting. We’ll be fixing all this later.
- From the menu bar, select
“Render>Detail Texture Mode”.
If you look at the list in the “Render” menu, you will see many different options. We are switching to “Detail Texture Mode” because we will be painting both Details and Textures. If this isn’t selected, you won’t be able to see what you’re painting correctly. When you switch modes, your main view may change slightly, but you probably won’t notice much difference until we begin painting.
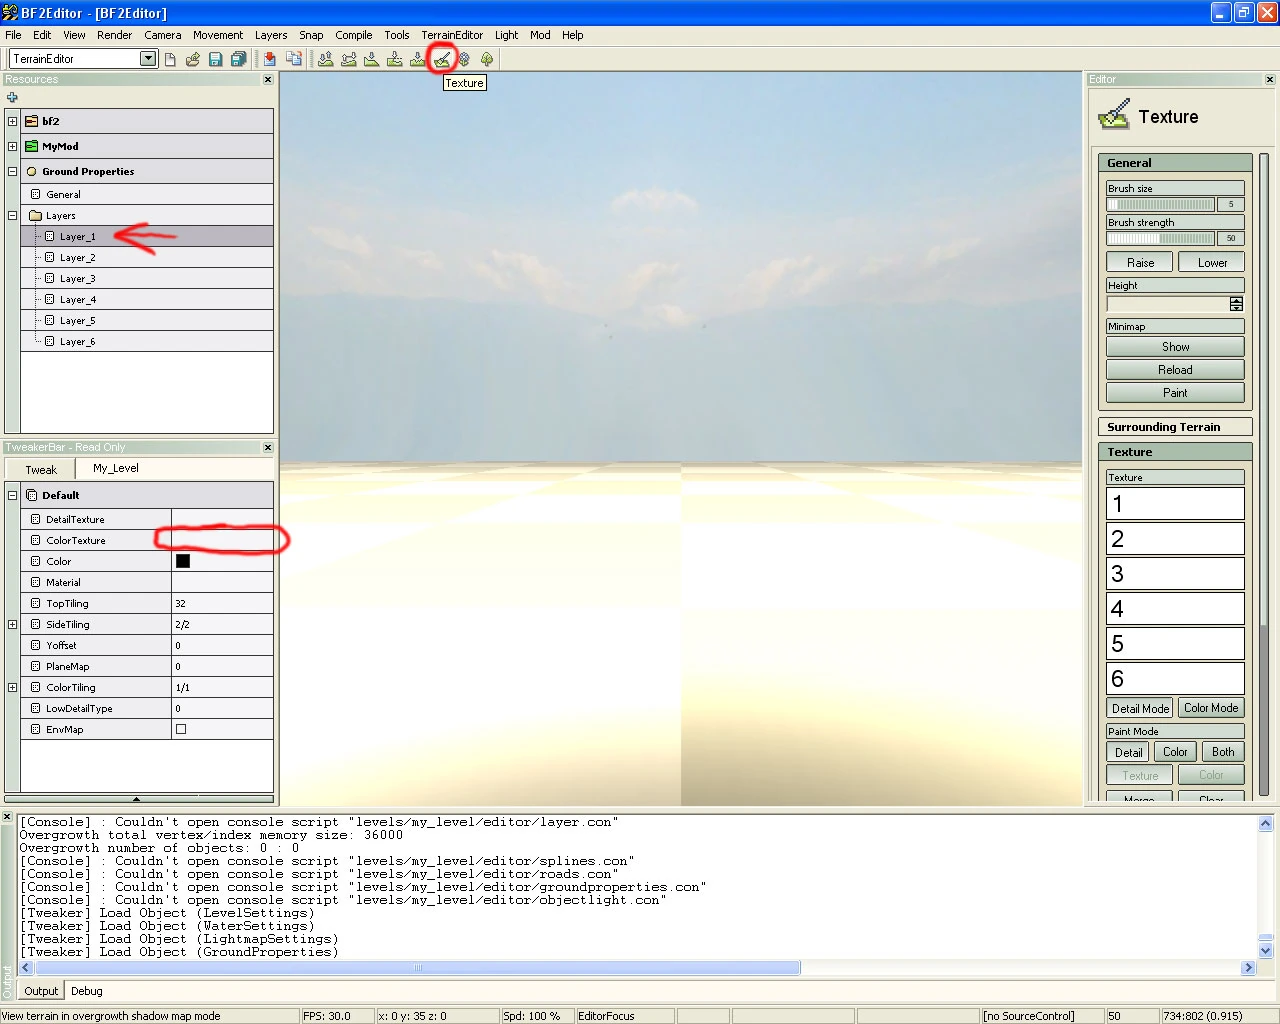
On the same row as the drop-down where we selected the Terrain Editor is a row of icons. The third from the right is the “Texture” icon. (It’s actually a picture of a paintbrush on a terrain.) If you hold the cursor over the icon, it will say “Texture”. Click on this button to change to texturing mode:
- In the Resources bar, expand
the Layers folder by clicking on the plus symbol to the left of it, then click on “Layer_1”.
  |
|---|
The Texture Layers[]
There are several different things in the editor that are referred to as “Layers”. In this case you will see Layer_1 through Layer_6. You should actually think of these more as “Brushes”. Each of these consists of a color texture, which is the main color you see when playing the game, and a detail texture, which is a second high-detail texture that gets blended into the color texture for the area of the terrain that is really close to the player. You’ll see more of how this works in a minute.
You are limited to 6 different combinations, hence the six “Layers”. We will now create the first layer.
- With Layer_1 selected, look
at the TweakerBar and click on the empty field to the right of “ColorTexture”. (It’s the second one down and is circled in the previous screenshot.)
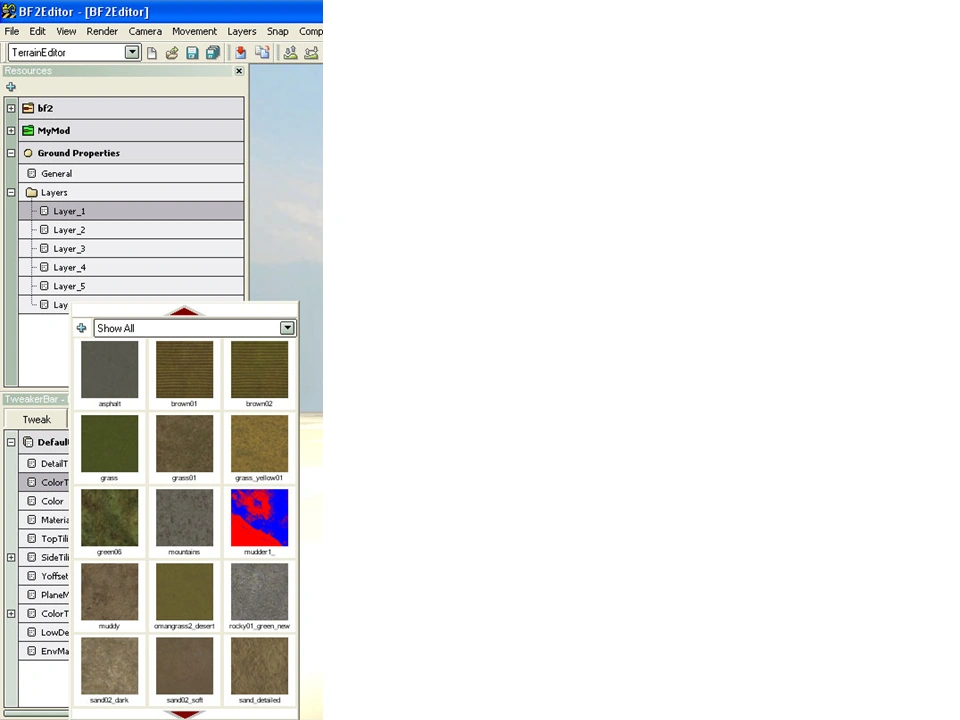
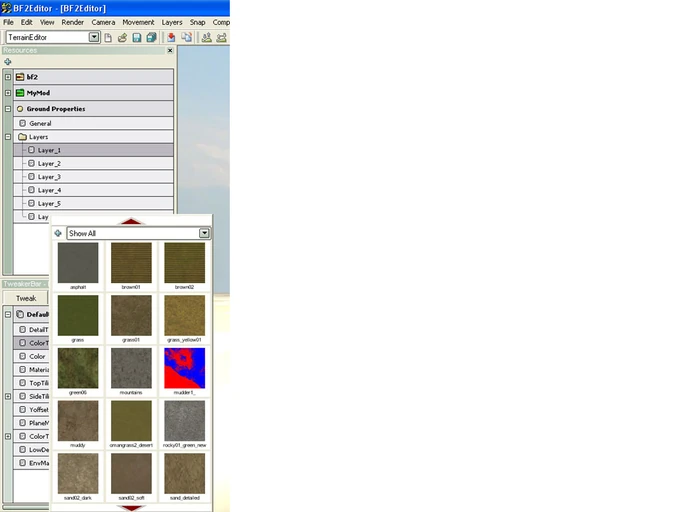
When you do this, it may take a few seconds, but a texture picker window will eventually appear. These are the textures that you can use for the overall color of your map. You can see what they are by their labels, but you can use any texture you like on any part of the map.
- Click on one of the textures to load it. (I’m going to use “green06):
  |
|---|
- Now click on the empty field
next to “DetailTexture” and select any texture you like. This is the detail you will see in the terrain that’s very close to you when playing the game. If you want to see an extreme example of what can be done with DetailTextures, choose “detail_cobble2”.
We also want to set up the material. This determines things like what sound effect is played when running across mud, for instance. It also determines things like how much wheels slip and so on.
- Click on the field next to
“Material”. A drop-down list will appear. If you can’t see the names, hold the cursor over the vertical border on the right side of the TweakerBar until horizontal arrows appear and then drag to the right to expand the window.
- Choose a material from the drop-down list. (I’m going to choose “Grass”.) 22.
Leave all other settings at their defaults.
Your TweakerBar should now look similar to this:
Painting the Terrain[]
We’ve created a Layer “Brush”.
Now it’s time to set some painting options and then paint.
  |
|---|
Note: BF2 TPaint will automatically paint your level for you: http://rocketman.f2o.org/bf2/tpaint.htm
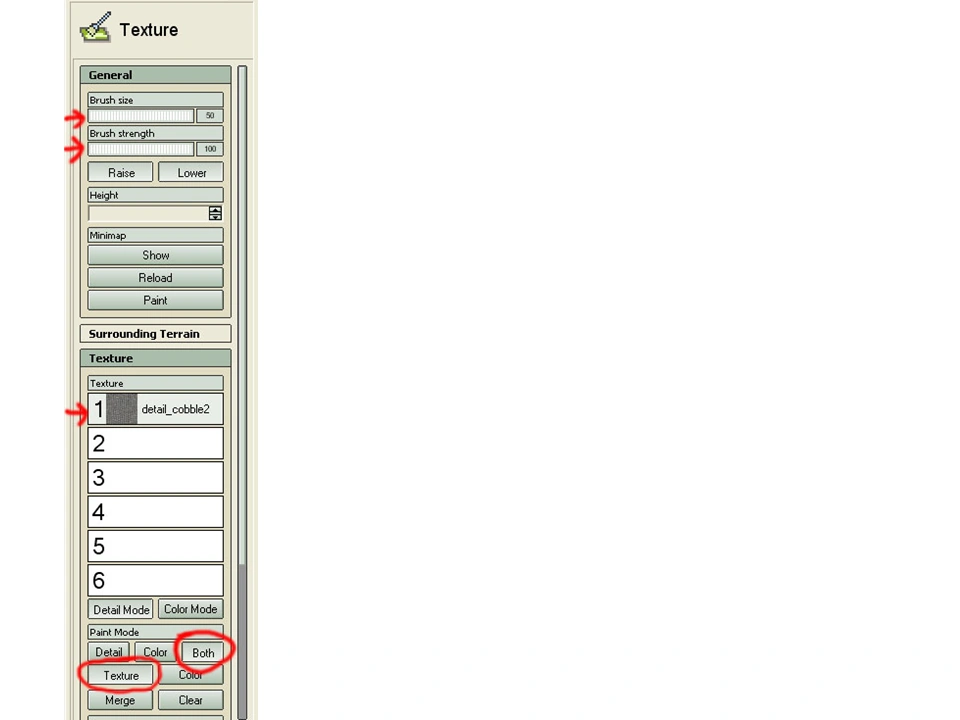
- On the right side of the
screen is the Editor bar. Under the first section, labeled “General”, drag the bar under “Brush size” all the way to the right.
- Do the same for “Brush
strength”.
You can experiment with these settings later. For now, we are turning them all the way up because we are going to be painting a large area.
- Below this section is a
section labeled “Texture”. You will see six selector buttons that correspond to the six layers in the Resources bar. Click on button 1 to be sure you haven’t somehow deselected it. Note: directly below the buttons labeled from 1 to 6 are two buttons labeled “Detail Mode” and “Color Mode”. All these two buttons do is determine what image is shown in the 1-6 buttons. They have nothing to do with actually painting. Don’t let this confuse you.
Directly below these two buttons is an entirely new section labeled “Paint Mode”. This is where we will set the painting options.
As I’ve stated before, a “Layer” is made up of both a Detail texture and a Color texture. Notice the three buttons in the Paint Mode section labeled “Detail”, “Color”, and “Both”. These buttons determine what is actually painted onto the terrain. This allows you to paint just one aspect at a time or both. What this means is you can lay down the basic overall color and detail and then go back and paint with just the color of another brush to change the texture without disturbing the Detail Texture. Don’t worry if you don’t understand all of this yet. It will make sense as you experiment.
- Click on the “Both” button.
This way we will paint both the Color and Detail textures at the same time.
- When you click on “Both” additional buttons become available underneath. Make
sure that “Texture” is highlighted. (It is by default) Yes, the labels get a bit confusing. Just trust me for now. You’re options should look like this. I’ve put red arrows and circles on the relevant parts:
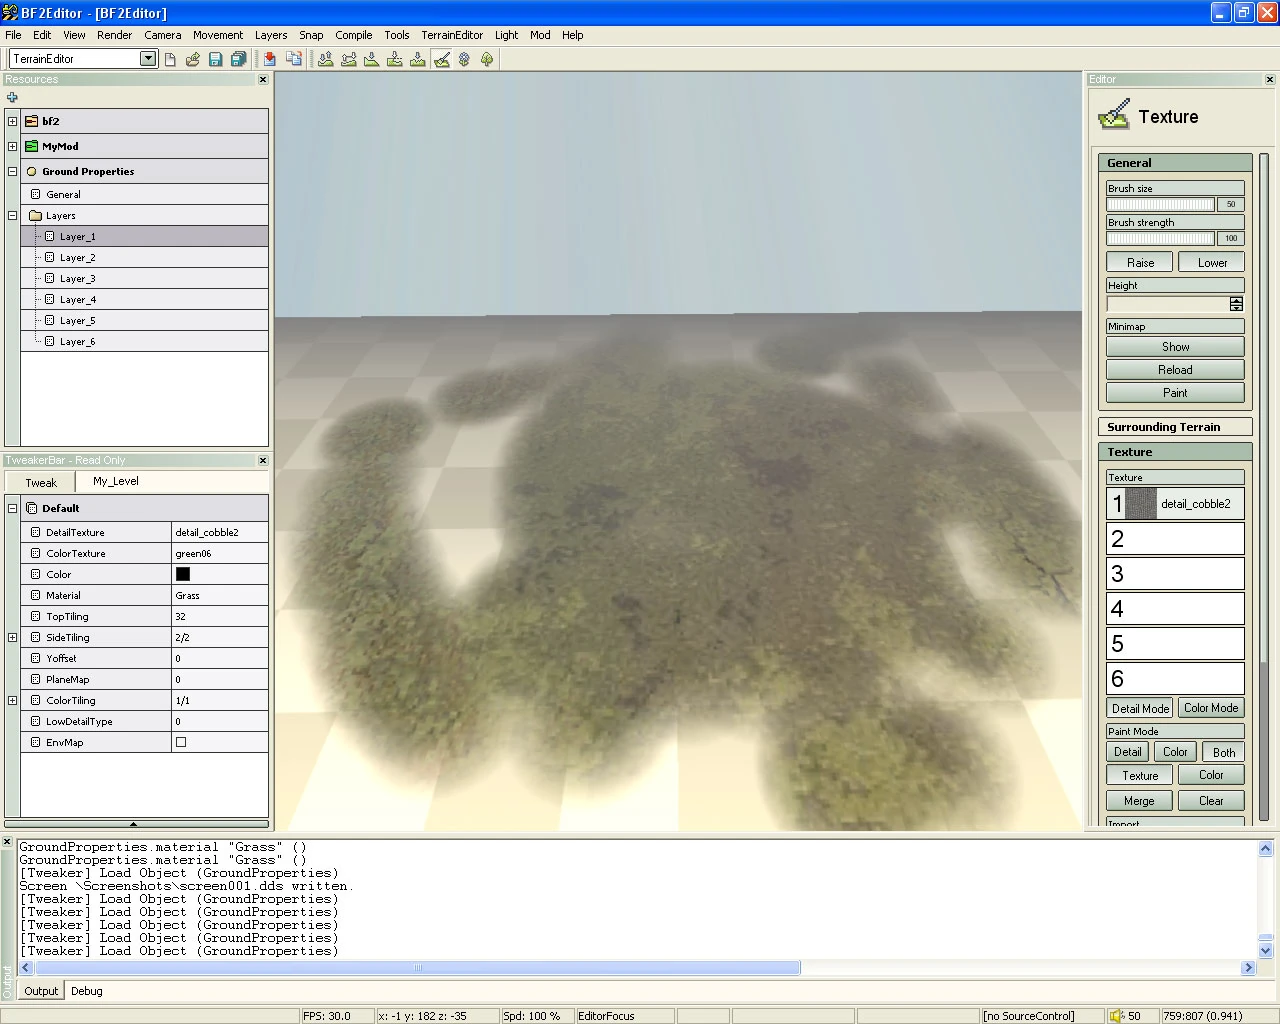
We’re now ready to start painting.
- In the main screen, click and
drag your cursor around to paint. You’ll want to move the brush rather slowly because you are actually painting a very large area and your computer may not be able to keep up:
Pressing the left mouse button will apply paint while pressing the right mouse button will remove it.
If you do not see any textures on your surface, make sure that you have “Render>Detail Texture Mode” selected
from the menu and that you have all settings in the Texture Bar on the right side of the screen correct.
  |
|---|
Notes on Interface Controls: A bit of an explanation on the controls will probably be helpful at this point.
Camera Movement: Camera movement is similar to what it is in the game: • A,D,W,S – Left, Right, Forward, and Back, respectively. • Hold down the middle mouse button while moving the mouse to rotate the camera. • Additionally, while holding down the middle mouse button, pressing Z or Control moves you up or down, perpendicular to the surface.
Brush Size Indicator: You can also activate a brush size indicator, but it takes some getting used to. While painting, press the spacebar once to change the editor “focus” to camera mode. What this means is that you can rotate the camera and use the Z and Control keys without having to press the middle mouse button. This is good for camera movement, but limits what else you can do because you no longer have a cursor.
Pressing the spacebar a second time brings back the cursor, except now it is a brush size indicator. Your focus is still limited to the main window, but you can paint, and pressing the middle mouse button will let you use all the movement keys. You just will not be able to move the cursor over any of the windows other than the main one.
Pressing the spacebar again toggles you back and forth between camera focus and painting focus.
The only way to get out of these modes is to hit the Escape key! Remember the Escape key. Any time you seem to be unable to get the cursor to do what you want, press the Escape key to be sure you haven’t switched “focus”.
You can also change the size of the brush by holding down <Control> while scrolling the mouse wheel. Holding down <Shift> and scrolling the mouse wheel will change the brush strength.
Render Options: You may notice that as you get farther away from your terrain, the fog settings obscure the surface. To turn this off, select “Render>Toggle Draw Fog” from the menu.
You may also wish to paint from a top-down mode by selecting “Camera>Top-Down Mode”, also from the menu.
More Painting: Continue painting your surface. Try clicking on Layer_2 and creating a second brush if you like.
Note that there is currently no “Flood Surface” option in the editor. To cover the entire surface with texture, you will have to paint the whole thing. This is not much of a problem on this map, but may take some time with larger sizes. Also remember that even though it may not look like it, you are actually painting a very large surface. You will see just how big in the level editing tutorial when we start placing objects.
Also note that if your brush goes off the edge of the surface, you may get a message saying “Do you really want to activate this heightmap?” This is for advanced use and will be explained in a later tutorial. For now just click “No”.
Finally, Note that you do not have to paint the entire surface in order to test a map. Any unpainted areas will be filled with a default texture when you save the map. You may go back and continue painting or change what you’ve previously painted at any time during the level creation process.
The Detail Texture []
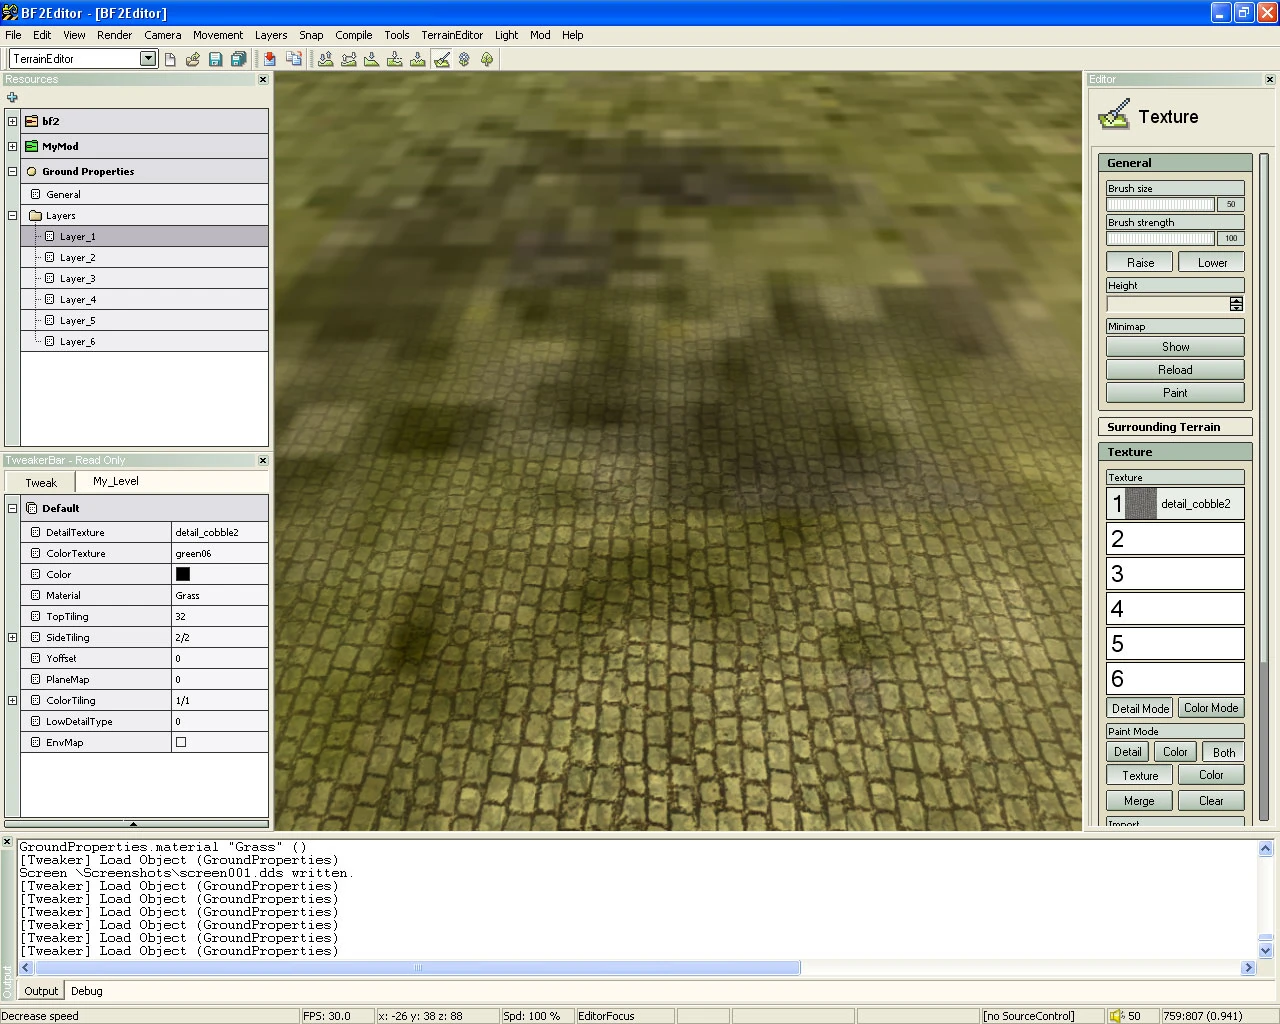
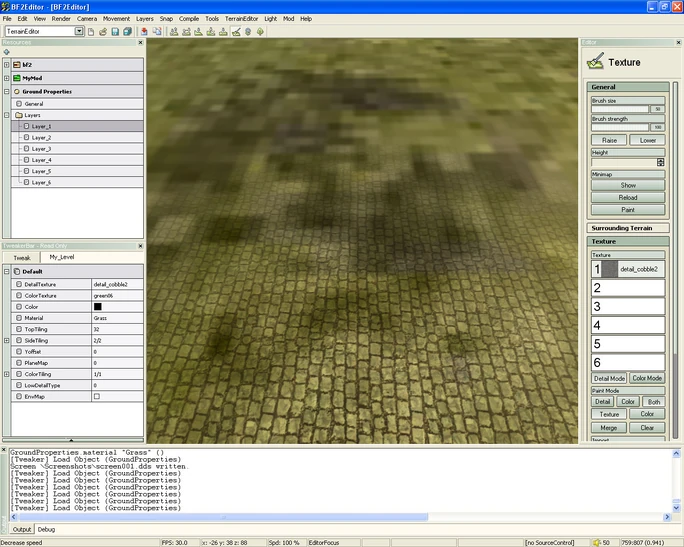
You can now see how the detail texture works.
- If you haven’t done so
already, use the camera movement keys to get very close to the surface. As you get closer, you will see the detail texture start to fade in: You can see here the cobblestone detail texture I chose blending with the “grass” color texture. The two
textures can be mixed and matched whatever way you want to get the effect you are trying to achieve.
  |
|---|
Sculpting the Terrain[]
Now that you’ve done some painting, you’ll probably want to make the surface a little more interesting.
- On the icon bar, locate the
“Modify” icon, which is the green hill shape with blue up and down arrows. Click this button to change to the sculpting tool:
The same basic rules apply as with the painting tool: Using the left mouse
button will raise the terrain while the right mouse button lowers it. You can
activate the brush size indicator and change the brush size and strength the
same way you did while painting the texture.
Additionally, notice that just below the brush size and strength bars on the right size of the screen, there are two buttons labeled “Raise” and “Lower”. These determine which direction you can move your terrain. For example: deactivating the “Raise” button will cause you not to be able to raise the terrain, only lower it.
This isn’t really all that useful when using the Modify tool, but it can be handy when using some of the other sculpting tools. For instance, when using the Smooth tool, if you deactivate the “Lower” button, the terrain will only be smoothed by raising the lower side of the terrain. This can be useful for a situation like when you have sculpted a plateau that you want to place buildings on and just want to smooth the slope leading up to it without destroying the work you’ve already done on the flat area.
The five sculpting icons in order are Modify, Smooth, Level, Platform, and Random tool. Play with these a bit on your map. Add some hills and valleys, but make sure you leave a few flat areas where you can add buildings later.
Here I’ve sculpted a couple of raised areas in the middle where the main bases will be, added some small mountains around the edges to add some interest, and made a second texture to cover the mountains, the raised camp areas, and a small road between them. I also turned off the fog in the Render menu so you can see it better:
== Saving Your Work ==
Before we move on to the next tutorial, we want to be sure and save our work.
- Select “File>Save All”
from the main menu.
This will bring up a window similar to this:
  |
|---|
You can see several different categories in this window. By default, the box next to any areas that you’ve
changed will be checked. You can optionally check or uncheck any boxes should you have a need. For now just leave everything as it is and click on “Yes”.
Note: “Save” and “Save All” are almost the same with the difference being that “Save” will only save changes made to the subsection of the editor you are currently working in. For instance: if you’ve worked on a vehicle in the object editor, then switched to the terrain editor, doing a “Save” will only save the changes you made in the terrain editor. If you choose “Save All”, the editor will bring up multiple windows, one for each subsection you’ve made changes in. This is good to use just before you quit the editor or after you’ve made a lot of changes in a lot of subsections. The editor will also normally bring up these windows and prompt you to save your changes if you should try to quit the editor with unsaved changes.
You are now ready to move on to the next tutorial, “Creating a Basic Level”.