BF42 Adding AI - Part 1
Based on Tutorials by Arc D'Wraith
Preface: Since Arc D'Wraith wrote his AI tutorials, there have been tools developed to help the setup of BF42 and BFV with a basic level of AI support. This tutorial explains how to create the AI manually. Understanding how it all works together will help you to troubleshoot your map AI and improve it.
NOTE: If you are using a DICE map, be sure to make changes in a map copy or a different mod, because making changes to an existing map could prevent you from playing this map online.
Welcome to Part One of the Ai .con Editing tutorial.
The purpose of this tutorial is to show you how to manually create Co-op & Single Player files to support a custom map.
In part 1 of this tutorial series, we will get the AI successfully running, then we will proceed to customize and further improve the AI in the Part 2 of this Tutorial series.
This tutorial will only cover Land based maps that only use Cars,Infantry, Tanks & Aircraft
Also, on occasions you may be required to do tasks that requires other software, such as RFA Tools, Image Editors and Map Editors, it is not within the scope of this tutorial to teach you other software. There are tutorials available that can explain how to use those tools.
With this mind, lets get going.
Tutorial Part 1 - Adding Ai to a custom Map
Aberdeen is being used an an example in this series. You will need to have a completed pathmap. If you do not, you can follow the The Pathmap Tutorials to do so. .
The quickest way to get an Ai in to your map, is to use all black pathmaps that match the map size (1024, 2048, 4096) and to borrow strategies from a similar map set up. Section 1.4.1 shows how to check the map size.
Kursk is a simple map, and has a fairly simple set of strategies that are good as base to start with.
Also, Battleax, MIdway, Aberdeen and Kursk all have a 'mirrored' game setup,as it has the same layout of Bases & Control Points regardless of which Side you are playing.
Picking the best Map to pinch your Ai from comes with experience, and knowing what you want to achieve,
But, by the end of this tutorials series,you should be able to write or customize your own Ai
1.1 - Create Addon Folder:
First, make a new folder to create your Co-op Addon in.
Rather than dump all the Ai files in with a complete map, we shall keep them separate for the moment. This allows you to create an Addon for a map, rather than having to compile it into the main archive.
If it's your own map, it is still a good idea to keep it separate as compiling the addon will be much quicker than compiling your full map every time you tweak the Ai
For this first step, using the desktop is quite handy.
1.2 - Extract Source Maps:
We need access to files within the Maps we will be working with.
Extract the following .RFA files to a handy location, these are the original maps and
their revision files.
Aberdeen.rfa
Aberdeen_003.rfa
Kursk.rfa
Kursk_000.rfa
Kursk_003.rfa
1.3 - Copying Files:
Open the folder that you extracted Kursk into.
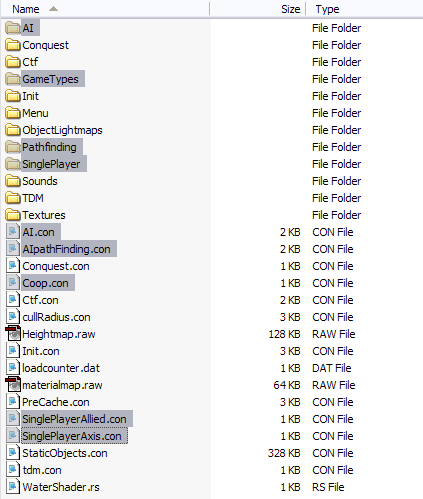
Select the following files (Fig 1a), and COPY them to the Folder you created in 1.1
 |
|||
|---|---|---|---|
| Fig 1a | |||
1.4 - First Round Editing:
Lets go through the files you just copied.
Open your Addon's folder, and we'll have a tour and a bit of an edit ...
1.4.1 - AI.CON
The first thing i would like you to do, is add a header to the top of this file.
Something like this ...
rem *** ABERDEEN ***
rem *** Co-op Addon Tutorial ***
rem *** yourname ***
You can include any details you like, the main point of this is to
label the file with the map's name.
This will save much confusion, when you have a dozen CON files open.
Highlight the block of text you just typed in, and COPY it to the clipboard
Next, we need to check the world map size setting, look for ...
aiSettings.setWorldMapSize 1024 1024
This sets the size of the Pathmaps, which in Kursk are 1024 x 1024 pixels.
Lucky for us, Aberdeen is the same size as Kursk, so we don't need to change this, but keep in mind for other maps, this size could be different.
|
!!! TIP !!! |
|||
|---|---|---|---|
| You can check your world size in INIT / TERRAIN.CON
GeometryTemplate.worldSize 1024 |
|||
Scroll down a little further, look for
game.showAIstats 0
and Change the value to 1 next, add this line
ai.showBotStats 0
Thats all the changes we are making for now, but before we Save & Close the file, scroll down to the bottom and have a look at ...
ai.addSAIStrategy 1 breakOut
ai.addSAIStrategy 1 holdAndCamp
ai.addSAIStrategy 1 single
ai.addSAIStrategy 1 double
ai.addSAIStrategy 2 breakOut
ai.addSAIStrategy 2 holdAndCamp
ai.addSAIStrategy 2 single
ai.addSAIStrategy 2 double
This is the list of Strategies that are available for each side to
use.
Notice that both Side 1 & Side 2 have the same 'mirrored' strategies.
Save your file, close it, and lets move on
1.4.2 - AIpathFinding.con
Again, the first thing i want you to do is add your header.
If the text you copied in the previous step is still in the clipboard, PASTE it down, or type it in ... again
We don't need to make any other changes to this file, so Save and Close the file.
1.4.3 - Ai \ Strategies.con
Moving into the Ai folder now, lets have a look at Strategies.con, yet again, the first thing i want you to do is add your header.
Now look at the four blocks of text in this file, notice they are the Four Strategies that we're listed in AI.CON
in Ai.con
ai.addSAIStrategy 1 breakOut
references to ... in Strategies.con
aiStrategy.createStrategy breakOut
Before we go, have a look at the code in a strategy ... keep this line in your mind.
aiStrategy.setPrerequisite breakOutPrereq
No other changes to this file, so Save & Close.
1.4.4 - Ai \ prerequisites.con
Still yet again, the first thing i want you to do is add your header.
Again in this file we have four blocks of text, if you look at
this line ...
aiStrategy.createPrerequisite breakOutPrereq
Notice that is a reference to the Strategy we just looked at ... Something to look at before we move on ...
aiStrategy.addCondition noFriendlyCPCond 10.0
Save & Close the file.
1.4.5 - Ai \ conditions.con
You guessed it, add your header first.
This file isn't broken up nicely for us, but have a look around
& you'll find this line ...
aiStrategy.createConstantCondition noFriendlyCPCond Crisp Equal Friendly ControlPoint 0
Once again, the reference between Conditions & a Prerequisite
is there
Save & close the file
1.4.6 - Ai \ StrategicAreas.con
Paste your header in, Save & Close the file, we're not even touching this for the moment ; )
1.4.7 - "Gametype" .cons
Open Coop.con, and add your header.
All we need to with this file, is make the settings the same to Aberdeen in Conquest.
Open Aberdeen's Conquest.con, and look at the following
settings ...
Game.setNumberOfTickets 1 100
Game.setNumberOfTickets 2 100
Game.setTicketLostPerMin 1 7
Game.setTicketLostPerMin 2 7
The settings for Kursk are different, so change them to match or
to your own preference.
You also need to open Singleplayerallies.con & Singleplayeraxis.con and make similar changes.
Next ... browse into the Gametypes folder, and delete all the files.
Go back and select Coop.con, COPY it and PASTE into the Gametypes folder
NOTE: POSSIBLE PROBLEM:
But if there is an Ai, Conquest mode will crash on loading, with an "Ai Allocation Error"
This is the line in
question:
run ai v_arg1 or run ai
Please Delete or rem the line the out as shown below to resolve the problem.
rem run ai v_arg1 or rem run ai
This line is not in Aberdeen's conquest.con and we don't have to worry about it, but it is in Battle of Britain conquest.con. Battlecraft adds it by default, so it is something to look out for.
This problem may also exist in the CTF.con & TDM.con files. If you need to change any files because of this, you will need to save the changed files in your Ai addon's folder, so it will update the map with the changes without altering the main archive.
These files also need to be duplicated in the Gametypes folder, if they are changed.
1.4.8 - Pathfinding Folder
Copy the Pathmaps you created in the Pathmap Tutorial to this Folder
1.4.8 - Singleplayer Folder
Browse to the extracted Aberdeen Singleplayer folder, COPY the contents and PASTE them into your Addon's Singleplayer folder. This will overwrite the old Kursk files.
1.4.9 - RFA Creation
When you create your .RFA we want to take advantage of the update system the game supports.
Aberdeen already has one update file, Aberdeen_003.rfa, we want to make sure our file supersedes all previous updates, and allows room for more updates, so use the filename Aberdeen_010.rfa
Create the .RFA and we are now ready for our first test run.
1.4.10 - First Test
Start Battlefield, Create a Multiplayer game, select CO-OP and add Operation Aberdeen to the list
These are the settings I use for testing:
|
Players: Time Limit: NR Rounds: Tickets: Axis: Allies: Ai Skill: Ai CPU: |
37 100 100 200% 9 10 85% 25% |
These settings will provide 18 bots on each side, and allows you to be in the game on the Allied Side, without throwing the team balance out. Once the game has started you can swap sides and there will be still 18 bots on each side.
Long rounds are useful, if you do have short rounds, just as something important is about to happen ... the round will end
Start the game.
If you see your desktop, you have missed something ...
Rather than waste a bucket load of time trying to find the error, Delete it, and start again. Its good practice anyway ; )
| TIP: | |||
|---|---|---|---|
| Have a look around the level
Drop the console by pressing the tilde key [ ~ ] and type ....I highly recommend you set up an "Alias" for this command as it will be your friend |
|||